


Quick Start Guide
For most lessons and documentation on this site, you will see URLs that look like https://YOURSITE.unt.edu/user. When we do that, we are providing you with the important part of the URL that you need for the lesson. As for the aforementioned URL, all you have to copy is /user and paste it to the end of your URL in the web browser, hit enter, and it should take you to the page that we're discussing.
- Login - If not already done so, log in at https://YOURSITE.unt.edu/user
- Blocks - Go to the Blocks UI admin page at https://YOURSITE.unt.edu/admin/structure/block. The following blocks are the only ones that should be enabled, in a region on the page. You may remove all others:
- Main menu
- System help
- Workbench information
- Main page content
- Site Information - Fill out the crucial information for your site. Go to the Site Information admin page at https://YOURSITE.unt.edu/admin/config/system/site-information.
- Site Name - Should be your specific department/college/group/institution that you're building the site for.
- Slogan - Not needed. It does not print anywhere on the screen. Although it is stored in the database, you can leave this empty.
- E-mail address - Not your boss, manager, V.P., etc. This is for the main contact/person responsible for taking care of the website.
- Parent College/Department
- Name - No default is set. This should be the name of the college, school, department or organization that your department is in.
- Link - No default is set. This is for the link to your parent college/department's main website. Be sure to use "http://" or "https://" in the URL. You may also simply use "//" as a wildcard. If you use the wildcard, the viewer's browser should pick the appropriate protocol identifier automatically.
- Footer Location Information
- Physical location - What's the address of your building?
- Google Maps Link
- Go to Google Maps - https://www.google.com/maps
- Type in your address into the search box
- Once the map to your location shows up, copy the URL from the address bar in your browser and paste it into the Google Maps Link field.
- Address 1, Address 2, City, State, Zipcode - this is your mailing address
- Phone Number(s) - Enter up to three phone numbers for your website
- Email Address(es) - Enter up to three email addresses for your website
- Front Page
- This field determines where Drupal sends your visitors when the first visit, or when they click your site name in the header. If you have not yet created your home page, you can leave this blank for now and move on to the next section... "Creating your first page".
- Do NOT use the default home page that is installed with your site. We are building a module that will create an actual "page/node", but it is not done yet.
- Error pages - Unless you're creating specific or special error pages, the default Drupal error pages will suffice.
- Create your first page - The front page you see when you visit your site for the first time is not editable. It’s what we call an “entity” and so you cannot edit it as you would a normal “page”. While you can place blocks via the Blocks UI, you should wait until you’ve created an actual page to do any block placement.
- Go and "add content" and pick a "Basic page", here: https://YOURSITE.unt.edu/node/add/page
- The Basic Page
- Title - This is what will show up at the top of your page, and in the tab in your browser.
- Body vs Section Panel - This might appear to be a trick, but it's not. You can only have one "body" section on your page. However, you can have as many "Section Panels" on the page as you like. This also allows you to split your content into more manageable chunks that you can later drag and drop and reorganize at a later time, if you choose. With advanced training on using the WDC Internal Grid (documentation to come later), and other advanced elements, your preference will undoubtedly end up being Section Panel.
- Advanced Layout Options - make sure you play around with these settings to see what they do to your page.
- Remove the primary container to allow full-width layouts - Every page has a container that keeps the content within a defined width. It is dependent on the browser window's width. Checking this box would allow you to achieve layouts like we use on the UNT home page... where you can see color bars or background images span across the screen form edge to edge. You should only remove the primary container restrictions if you are planning on using the WDC Internal Grid, otherwise your content will go from edge to edge in the browser window.
- Adjust the Page title's gutters for wide layouts - If you remove the primary container, your page title will not line up properly with the content as defined in the WDC Internal Grid. Check this box to add the appropriate padding and margin to the page title.
- Hide the page title - Checking this box will hide the page title on the screen. We did this on the UNT home page, for instance.
- Manual CSS - This field is for if you need to add page-specific CSS to just this page. It will not show up on any other page. There is no need to type <style> tags. The theme automatically wraps them around whatever you type into this field.
- Menu settings
- Provide a menu link - If you check this box, it will add a link to the menu that you select in the subsequent "Parent Item" field.
- Menu link title - This will be the label for you menu item... how it will look in the menu system. Always best to have a short, but contextual link label.
- Description - While not required, this is good practice for SEO purposes and for screen readers and others who might need extra assistance in understanding what the link goes to.
- Parent item - here is where you tell Drupal which menu to put the link into. Since this is your first page, you should probably select "Main menu".
- Weight - This is a quick way to set the initial place/order for the link, in the menu. You can also re-arrange by dragging the order of menu items on the Menu UI admin page located at: https://YOURSITE.unt.edu/admin/structure/menu.
- Revision Information - While not necessarily when you first create your page, you should know that it's good practice to create a revision every time you make a significant change to your page. By creating a revision, you can always revert your changes. Simply check the box and provide a short description of what you did so it's easy to reference in the future.
- URL path settings - Drupal attempts to provide a well-named URL for your page based on the Title you typed into the first field on the page. However, it is sometimes necessary to edit the resulting URL or provide a different URL altogether. You can do that in this section. Drupal will not create the URL until you've saved the page for the first time. THIS is the URL/web address that you should put into the "Front Page" field in Site Information.
- Uncheck Generate automatic URL alias if you'd like to create a better URL.
- Contextual, but short address using dashes (-) and not underscores (_) is best practice.
- All lower case
- Example: your-first-page
- Authoring information - This is not printed on your page, by default, on basic pages.
- Publishing options - Published means the page will be visible to anyone. Unpublished means it is only visible to those who are logged in and have administrative or relevant roles/priviledges.
- Promoted to front page - This does not mean that your page automatically becomes your front page. It serves as a variable that can be used in Views (talk about much later) and other modules/functionality.
- Sticky at top of lists - This does not mean that it will automatically put your page at the top of lists. Like "Promoted to front page", this serves as a variable for use by other modules and functionality.
WDC Site Information
Building your first page
WDC Basic Page
The WDC Basic Page module adds useful tools to the Basic Page content type, including layout options and the ability to add CSS directly to the page. These Advanced Options and Manual CSS components are located in the tabs at the bottom of the edit form for your page.
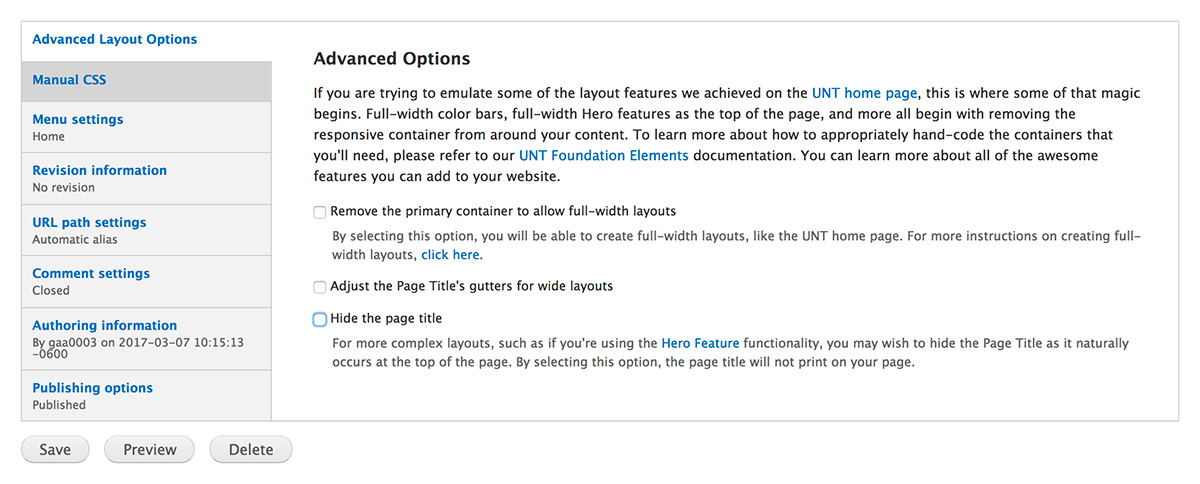
Advanced Options
The Advanced Options allow you to manipulate the responsive container in your page. The responsive container normally keeps all of your content within a defined area that adapts and responds to the width of your browser window.
- Remove the primary container to allow full-width layouts
In order to achieve full-width layouts you can select this option and it will allow your content to go from edge to edge. A good example would be the Social Blocks section of the UNT homepage.
If you select to remove the primary container, but still need to keep content within the defined responsive area, you'll need to make sure and utilize the Internal Grid system of wrappers around your content. A perfect example would be the Top Brags section of the UNT home page. In this example, the section is 100% the width of the screen, but the content stays within the confines of the normal grid. You could, for instance, choose to give it a background color or image, like we do in the UNT Libraries section on the Academics page of the UNT home site.
- Adjust the Page Title's gutters for wide layouts
If you remove the primary container, you might need to check this box. It will add the requisite padding and margins around the page heading, so that it lines up with the edges of you content area.
- Hide the page title
For more complex layouts, such as if you're using the Hero Feature functionality, you may wish to hide the Page Title as it naturally occurs at the top of the page. By selecting this option, the page title will not print on your page.
Advanced Options
Manual CSS
Sometimes you may need to add custom CSS for your page. In this case, you could use the Manual CSS field. It will inject the CSS into the <head> of the HTML document that is generated by Drupal. The code will ONLY be available to the page you are on. There is no need to add <style> tags around your CSS, the system will write them in for you.
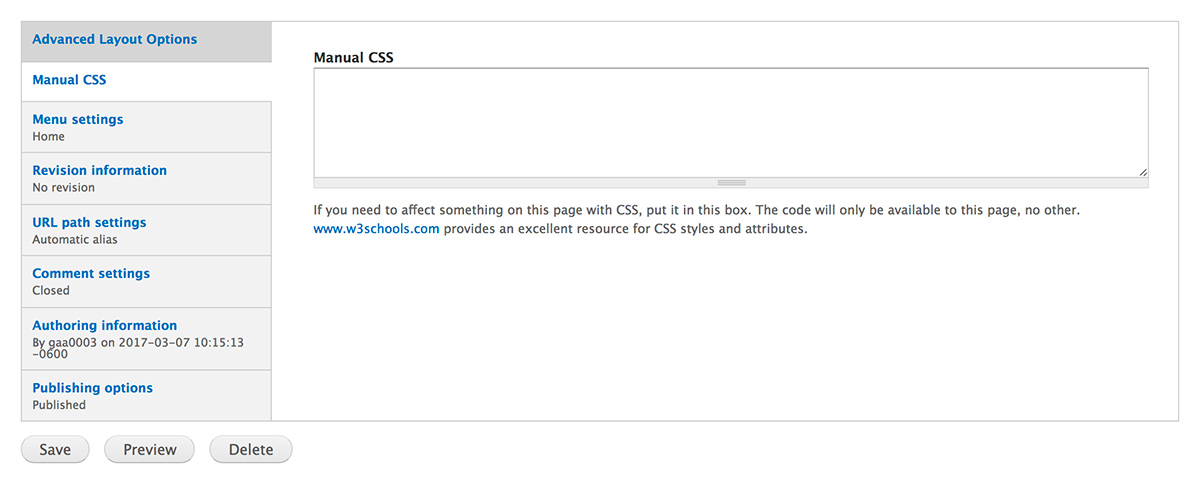
Manual CSS
WDC Hero Feature
The WDC Hero Feature allows you to create full-width hero image features that you can place at the top of your pages. The Hero Feature gives you the ability to showcase or highlight an important feature for your page or site.
- To create a new Hero Feature block, go to YOURSITE/admin/content/blocks.
- Click the + Add Block link.
- NOTE: The feature Label will be how you identify the block within the Block UI admin page. A good example label might be HERO - Front Page.
- There is no need to fill out the Title. You may leave that blank as it will not print on the page.
- Follow the instructions on the creation form, and fill out the rest of the content on the page.
- Once you’ve created the block, go to the Blocks UI admin page, located at YOURSITE/admin/structure/block.
- Identify the block you created, and click the configure link so that you can set which page(s) it should be visible on. Save.
- Drag the block into the Hero Feature block region. Save.
WDC Feeds
UNT Feeds allows for the importing of UNT news and calendar feeds to be displayed on your site.
- To add a feed. Go to and click on Structure in the admin menu.
- Click the Add UNT Feeds link.
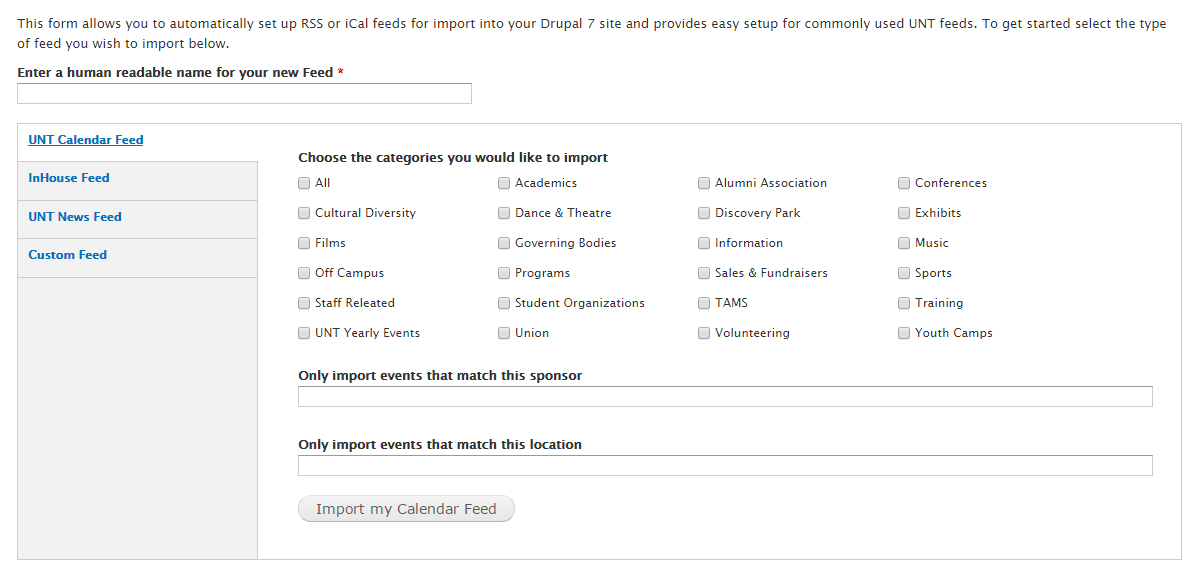
- On this page there are several options to choose from. Including UNT Calendar Feed, InHouse Feed, UNT News Feed and Custom Feed. Additionally the form allows for setting up a RSS or iCal feed.
- First enter the desired name for your feed. For example: UNT Music Calendar
- After selecting the appropriate feed from the tabs, you will be given the option to choose from preselected categories or you may enter an option in a text field.
- When you have finished entering everything on the chosen tab, click the Import my Calendar Feed button.
- At this point the feed is being imported and you should see a progress bar.
- After the import is finished you go to and click on Content in the admin menu.
- You should see the newly created feed listed.
Foundation Elements
There's a lot of components that you have available to you, because they're already built into Foundation. We'll add a list here later. In the meantime, you should visit the Zurb Foundation 5 documentation to see everything that is available. Be sure you scroll the menu along the left side of the page for a complete list, with examples, of those items built into Foundation. Here's a short list:
- Grid - For breaking up the content area of your page, into columns.
- Block Grid - Great for items like thumbnails. 6 inline at large, 4 inline for medium, et al.
- Flex Video - for making inline videos responsive.
- Accordion - For building content accordions. Look at our FAQ page.
- Tabs - For building tabbed content within a page.